数据挖掘组队学习打卡——Task2:数据分析
目录
赛题:零基础入门数据挖掘-二手车交易价格预测
地址:天池
数据和完整的代码放在了我的GitHub上。
1 EDA目标
- 熟悉数据集,了解数据集,对数据集进行验证来确定所获得的数据集可以用于接下来的机器学习或深度学习使用。
- 了解了数据集之后,下一步要去了解变量间的相互关系以及变量与预测值之间存在的关系。
- 引导数据科学从业者进行数据处理以及特征工程的步骤,让接下来的预测问题更可靠。
2 载入需要的库
载入各种数据科学以及可视化库:
- 数据科学库 pandas、numpy、scipy;
- 可视化库 matplotlib、seaborn;
- 其他;
import warnings # 利用过滤器来实现忽略警告语句
warnings.filterwarnings('ignore')

import pandas as pd
import numpy as np
import matplotlib.pyplot as plt
import seaborn as sns
import missingno as msno # 缺失值可视化包
missingno的安装遇到了问题,豆瓣源也不行,改成清华源就可以了,代码如下
pip install missingno -i https://pypi.tuna.tsinghua.edu.cn/simple
3 载入数据
- 载入训练集和数据集
- 简略观察数据(head()+shape)
Train_data = pd.read_csv('train.csv',sep=' ')
Test_data = pd.read_csv('testA.csv',sep=' ')
# 简略观察数据(head()+shape)
Train_data.head().append(Train_data.tail())
我平时一般只看head(),学到了,tail()也要看一看
Train_data.shape
(150000, 31)
Test_data.head().append(Test_data.tail())
Test_data.shape
(50000, 30)
测试集比训练集少一列
pandas用多了就会有这个习惯,拿到数据首先看head()、shape、info()和describe。
4 数据总览
4.1 通过describe()来熟悉数据的相关统计量
Train_data.describe()
Test_data.describe()
4.2 通过info()来熟悉数据类型
Train_data.info()
model、bodyType、fuelType、gearbox有缺失值
Test_data.info()
bodyType、fuelType、gearbox有缺失值
5 判断数据缺失值和异常
5.1 查看每列的存在nan情况
Train_data.isnull().sum()
Test_data.isnull().sum()
训练集有4列存在缺失值,测试集有3列存在缺失值。
# nan可视化
missing = Train_data.isnull().sum()
missing = missing[missing>0]
missing.sort_values(inplace=True)
missing.plot.bar()
如果nan很少一般选择直接填充,如使用lgb等树模型进行填充;如果nan过多可以删掉。
5.2 可视化看下缺省值
msno.matrix(Train_data.sample(250))
msno.bar(Train_data.sample(1000))
msno.matrix(Test_data.sample(250))
msno.bar(Test_data.sample(1000))
跟前面一样的结论。
5.3 异常值检测
Train_data.info()
对其他变量都进行显示
Train_data['notRepairedDamage'].value_counts()
-也是缺失值,直接用info也显示不出来,先不做处理,替换成nan
Train_data['notRepairedDamage'].replace('-', np.nan, inplace=True)
Train_data['notRepairedDamage'].value_counts()
Train_data.isnull().sum()
Test_data['notRepairedDamage'].value_counts()
跟测试集一样的问题,做同样处理
Test_data['notRepairedDamage'].replace('-', np.nan, inplace=True)
Test_data['notRepairedDamage'].value_counts()
Train_data["seller"].value_counts()
Train_data["offerType"].value_counts()
seller和offerType特征严重倾斜,一般不会对预测有什么帮助,故先删掉。
del Train_data["seller"]
del Train_data["offerType"]
del Test_data["seller"]
del Test_data["offerType"]
6 了解预测值的分布
Train_data['price']
Train_data['price'].value_counts()
6.1 总体分布概况(*约翰逊分布等)
import scipy.stats as st
y = Train_data['price']
plt.figure(1); plt.title('Johnson SU')
sns.distplot(y, kde=False, fit=st.johnsonsu)
plt.figure(2); plt.title('Normal')
sns.distplot(y, kde=False, fit=st.norm)
plt.figure(3); plt.title('Log Normal')
sns.distplot(y, kde=False, fit=st.lognorm)
由拟合结果可以看出,价格不服从正态分布,在进行回归之前必须进行转换。虽然对数变换做得很好,但最佳拟合是*约翰逊分布。
- 查看skewness and kurtosis
sns.distplot(Train_data['price'])
print("Skewness: %f" % Train_data['price'].skew())
print("Kurtosis: %f" % Train_data['price'].kurt())
偏度是3.34,大于0,右偏;峰度是19.00,大于0,尖峰分布。
- 查看其他特征的偏度和峰度。
Train_data.skew(), Train_data.kurt()
sns.distplot(Train_data.skew(),color='blue',axlabel ='Skewness')
sns.distplot(Train_data.kurt(),color='orange',axlabel ='Kurtness')
- 查看预测值的具体频数
plt.hist(Train_data['price'], orientation='vertical', histtype = 'bar', color ='red')
plt.show()
查看频数, 大于20000的值极少,其实这里也可以把这些当作特殊的值(异常值)直接用填充或者删掉
# log变换
plt.hist(np.log(Train_data['price']), orientation='vertical', histtype = 'bar', color ='red')
plt.show()
*log变换之后的分布较均匀,可以进行log变换进行预测
7 特征分为类别特征和数字特征,并对类别特征查看unique分布
数据类型列
- name - 汽车编码
- regDate - 汽车注册时间
- model - 车型编码
- brand - 品牌
- bodyType - 车身类型
- fuelType - 燃油类型
- gearbox - 变速箱
- power - 汽车功率
- kilometer - 汽车行驶公里
- notRepairedDamage - 汽车有尚未修复的损坏
- regionCode - 看车地区编码
- seller - 销售方 【已删】
- offerType - 报价类型 【已删】
- creatDate - 广告发布时间
- price - 汽车价格
- v_0’, ‘v_1’, ‘v_2’, ‘v_3’, ‘v_4’, ‘v_5’, ‘v_6’, ‘v_7’, ‘v_8’, ‘v_9’, ‘v_10’,‘v_11’, ‘v_12’, ‘v_13’,‘v_14’(根据汽车的评论、标签等大量信息得到的embedding向量)【人工构造 匿名特征】
# 分离label即预测值
Y_train = Train_data['price']
# 这个区别方式适用于没有直接label coding的数据
# 这里不适用,需要人为根据实际含义来区分
# 数字特征
# numeric_features = Train_data.select_dtypes(include=[np.number])
# numeric_features.columns
# # 类型特征
# categorical_features = Train_data.select_dtypes(include=[np.object])
# categorical_features.columns
numeric_features = ['power', 'kilometer', 'v_0', 'v_1', 'v_2', 'v_3', 'v_4', 'v_5', 'v_6', 'v_7', 'v_8', 'v_9', 'v_10', 'v_11', 'v_12', 'v_13','v_14' ]
categorical_features = ['name', 'model', 'brand', 'bodyType', 'fuelType', 'gearbox', 'notRepairedDamage', 'regionCode']
# 训练集特征nunique分布
for cat_fea in categorical_features:
    print(cat_fea + "的特征分布如下:")
    print("{}特征有{}个不同的值".format(cat_fea, Train_data[cat_fea].unique()))
    print(Train_data[cat_fea].value_counts())
# 测试集特征nunique分布
for cat_fea in categorical_features:
    print(cat_fea + "的特征分布如下:")
    print("{}特征有个{}不同的值".format(cat_fea, Test_data[cat_fea].nunique()))
    print(Test_data[cat_fea].value_counts())
8 数字特征分析
numeric_features.append('price')
Train_data.head()
8.1 相关性分析
# 1) 相关性分析
price_numeric = Train_data[numeric_features]
correlation = price_numeric.corr()
print(correlation['price'].sort_values(ascending=False),'\n')
v_12、v_8、v_0、v_3和price相关性较高。
f , ax = plt.subplots(figsize = (7, 7))
plt.title('Correlation of Numeric Features with Price',y=1,size=16)
sns.heatmap(correlation,square = True,  vmax=0.8) # 画热图
热图上颜色的深浅可以更直观的用来描述相关性的强弱,颜色越深,相关性越强。
# 把预测值剔除
del price_numeric['price']
- 查看几个特征的偏度和峰值
# 2)查看几个特征的偏度和峰度
for col in numeric_features:
    print('{:15}'.format(col),
          'Skewness: {:05.2f}'.format(Train_data[col].skew()) , '   ' ,'Kurtosis: {:06.2f}'.format(Train_data[col].kurt()))
- 每个数字特征的分布可视化
f = pd.melt(Train_data, value_vars=numeric_features)
g = sns.FacetGrid(f, col="variable",  col_wrap=2, sharex=False, sharey=False)
g = g.map(sns.distplot, "value")
- 数字特征相互之间的关系可视化
sns.set()
columns = ['price','v_12','v_8','v_0','power','v_5','v_2','v_6', 'v_1', 'v_14']
sns.pairplot(Train_data[columns],size = 2 ,kind ='scatter',diag_kind='kde')
plt.show()
这段代码对电脑配置要求比较高,我在自己电脑上跑了好久都出不来结果,最后在天池实验室跑的。
Train_data.columns
Y_train
- 多变量互相回归关系可视化
fig, ((ax1, ax2), (ax3, ax4), (ax5, ax6), (ax7, ax8), (ax9, ax10)) = plt.subplots(nrows=5, ncols=2, figsize=(24, 20))
# ['v_12', 'v_8' , 'v_0', 'power', 'v_5',  'v_2', 'v_6', 'v_1', 'v_14']
v_12_scatter_plot = pd.concat([Y_train,Train_data['v_12']],axis = 1)
sns.regplot(x='v_12',y = 'price', data = v_12_scatter_plot,scatter= True, fit_reg=True, ax=ax1)

v_8_scatter_plot = pd.concat([Y_train,Train_data['v_8']],axis = 1)
sns.regplot(x='v_8',y = 'price',data = v_8_scatter_plot,scatter= True, fit_reg=True, ax=ax2)

v_0_scatter_plot = pd.concat([Y_train,Train_data['v_0']],axis = 1)
sns.regplot(x='v_0',y = 'price',data = v_0_scatter_plot,scatter= True, fit_reg=True, ax=ax3)

power_scatter_plot = pd.concat([Y_train,Train_data['power']],axis = 1)
sns.regplot(x='power',y = 'price',data = power_scatter_plot,scatter= True, fit_reg=True, ax=ax4)

v_5_scatter_plot = pd.concat([Y_train,Train_data['v_5']],axis = 1)
sns.regplot(x='v_5',y = 'price',data = v_5_scatter_plot,scatter= True, fit_reg=True, ax=ax5)

v_2_scatter_plot = pd.concat([Y_train,Train_data['v_2']],axis = 1)
sns.regplot(x='v_2',y = 'price',data = v_2_scatter_plot,scatter= True, fit_reg=True, ax=ax6)

v_6_scatter_plot = pd.concat([Y_train,Train_data['v_6']],axis = 1)
sns.regplot(x='v_6',y = 'price',data = v_6_scatter_plot,scatter= True, fit_reg=True, ax=ax7)

v_1_scatter_plot = pd.concat([Y_train,Train_data['v_1']],axis = 1)
sns.regplot(x='v_1',y = 'price',data = v_1_scatter_plot,scatter= True, fit_reg=True, ax=ax8)

v_14_scatter_plot = pd.concat([Y_train,Train_data['v_14']],axis = 1)
sns.regplot(x='v_14',y = 'price',data = v_14_scatter_plot,scatter= True, fit_reg=True, ax=ax9)

v_13_scatter_plot = pd.concat([Y_train,Train_data['v_13']],axis = 1)
sns.regplot(x='v_13',y = 'price',data = v_13_scatter_plot,scatter= True, fit_reg=True, ax=ax10)
这里也是在天池实验室跑的。
9 类型特征分析
- unique分布
for fea in categorical_features:
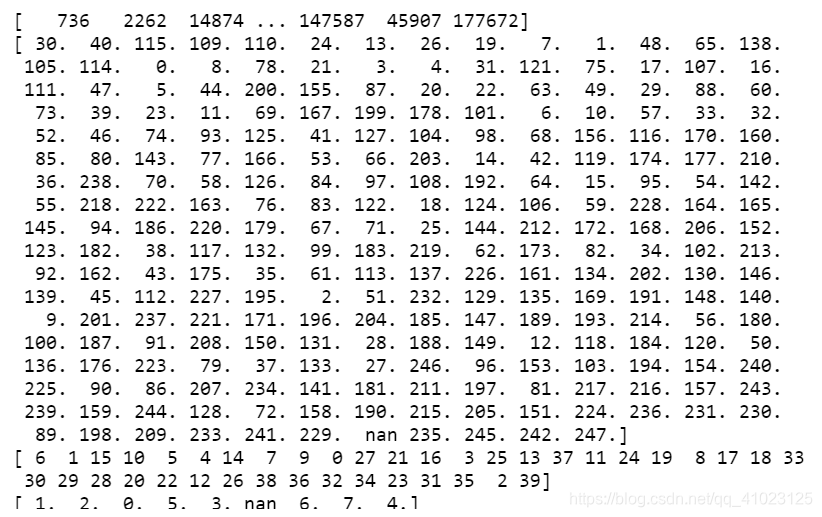
print(Train_data[fea].unique())
```

```python
categorical_features
- 类别特征箱形图可视化
# 因为 name和 regionCode的类别太稀疏了,这里我们把不稀疏的几类画一下
categorical_features = ['model',
 'brand',
 'bodyType',
 'fuelType',
 'gearbox',
 'notRepairedDamage']
for c in categorical_features:
    Train_data[c] = Train_data[c].astype('category')
    if Train_data[c].isnull().any():
        Train_data[c] = Train_data[c].cat.add_categories(['MISSING'])
        Train_data[c] = Train_data[c].fillna('MISSING')

def boxplot(x, y, **kwargs):
    sns.boxplot(x=x, y=y)
    x=plt.xticks(rotation=90)

f = pd.melt(Train_data, id_vars=['price'], value_vars=categorical_features)
g = sns.FacetGrid(f, col="variable",  col_wrap=2, sharex=False, sharey=False, size=5)
g = g.map(boxplot, "value", "price")
Train_data.columns
- 类别特征的小提琴图可视化
catg_list = categorical_features
target = 'price'
for catg in catg_list:
    sns.violinplot(x=catg, y=target, data=Train_data)
    plt.show()
小提琴图其实就是更直观一点的箱线图。
categorical_features = ['model','brand','bodyType','fuelType','gearbox','notRepairedDamage']
- 类别特征的柱形图可视化类别
def bar_plot(x, y, **kwargs):
    sns.barplot(x=x, y=y)
    x=plt.xticks(rotation=90)

f = pd.melt(Train_data, id_vars=['price'], value_vars=categorical_features)
g = sns.FacetGrid(f, col="variable",  col_wrap=2, sharex=False, sharey=False, size=5)
g = g.map(bar_plot, "value", "price")
- 特征的每个类别频数可视化(count_plot)
def count_plot(x,  **kwargs):
    sns.countplot(x=x)
    x=plt.xticks(rotation=90)

f = pd.melt(Train_data,  value_vars=categorical_features)
g = sns.FacetGrid(f, col="variable",  col_wrap=2, sharex=False, sharey=False, size=5)
g = g.map(count_plot, "value")
10 用pandas_profiling生成数据报告
import pandas_profiling
pfr = pandas_profiling.ProfileReport(Train_data)
pfr.to_file("./example.html")
pandas_profiling库很难装。
11 经验总结
数据探索在机器学习中一般称为EDA(Exploratory Data Analysis),是指对已有的数据(特别是调查或观察得来的原始数据)再尽量少的先验假定下进行探索,通过作图、制表、方程拟合、计算特征量等手段来探索数据的结构和规律的一种数据分析方法。
数据探索可以分为以下几步:
- 初步分析
- 直接查看数据或sum、mean、describe等统计函数
- 可以从样本数量、训练集数量、是否有时间特征、是否是时序问题、特征的含义(非匿名特征)、特征类型(字符串、int、float、time)、特征的缺失情况(注意缺失值的表现形式,有些是空的、有些是nan、还有些是-)、特征的均值方差等。
- 缺失值处理
- 缺失值占比高于30%时应进行处理
- 处理方式:填充[均值填充、0填充、众数填充等],删除,先做样本分类用不同的模型去预测。
- 异常值处理
- 分析是否是异常值
- 应该剔除还是用正常值填充
- 是记录异常还是机器本身异常
- 对Label做专门的分析,分析标签的分布情况等。
- 进一步分析
- 对特征作图
- 特征和label联合作图
- 特征和特征联合作图
参考:https://tianchi.aliyun.com/notebook-ai/detail?spm=5176.12281978.0.0.68021b43seyeBj&postId=95457